Go to: Previous Page
Steps to transcribe
Step 1: Find an item you want to transcribe
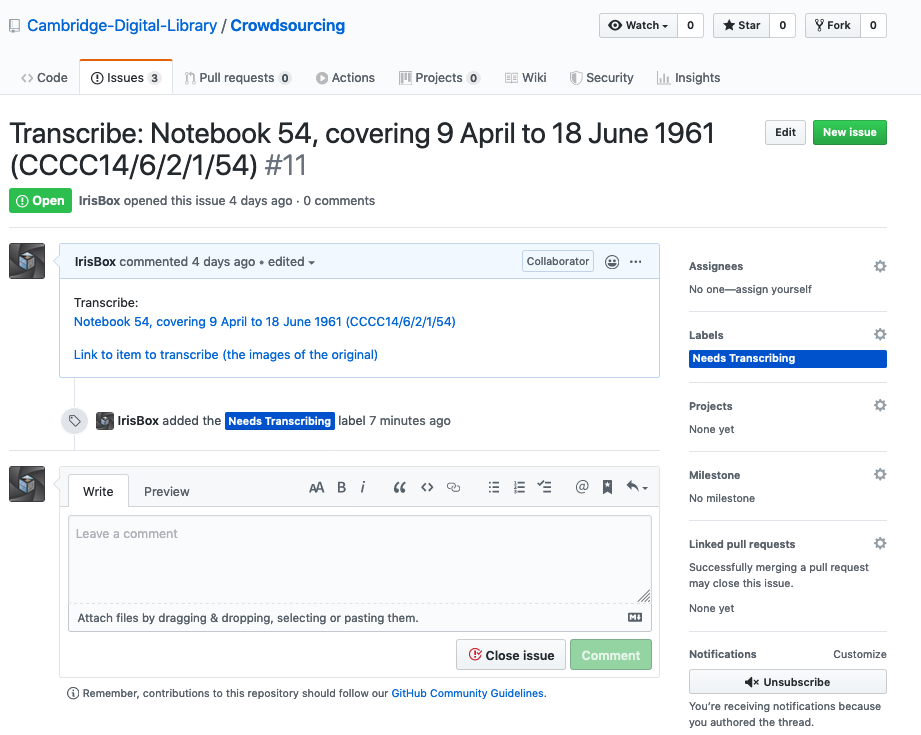
Find an item to transcribe by going to our GitHub "Issues" list.
You will see a list of "Issues" - these are like tasks that need doing. They have labels so that we can keep track of what needs doing, what is complete and what stage each file is at. Find one that has a blue "Needs Transcribing" label and click on the issue title.
You should now see further details of the task, including the title and url of the original item, and a link to the text file that you will need to transcribe into.

You can view the original item using the link and have a look through a few pages to get an idea of what it will be like to transcribe.
If you like the look of it, head back to the issue and look for the "Assignees" section of the task (usually to the right of the screen or try scrolling down).
This should read "No one - assign yourself". You can click on the "assign yourself" text to let us know you have chosen to work on that item.
The "labels" section of the task, below "Assignees", will allow you to change the label from "Needs Transcribing" to "Work in Progress" by clicking on the word "Labels".
You're now ready to begin transcribing (Yay!) - to do so, find and click the "Transcription text file to edit:" link in the issue. If you right-click the link and select "Open in new window" then you will be able to see the text file in the new window and then open the link to the images in the first window.
Step 2: Start transcribing
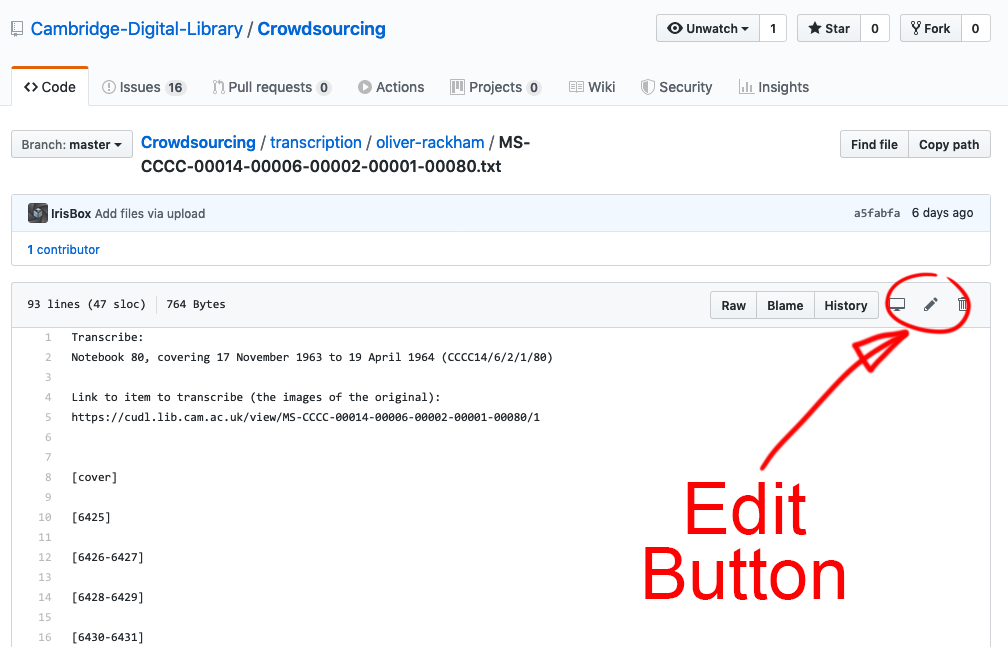
You should now see the text file that you are going to edit.
To begin editing, find and click the "pencil" icon - this should be to the top-right hand side of the file viewing window. This is indicated in the image below:

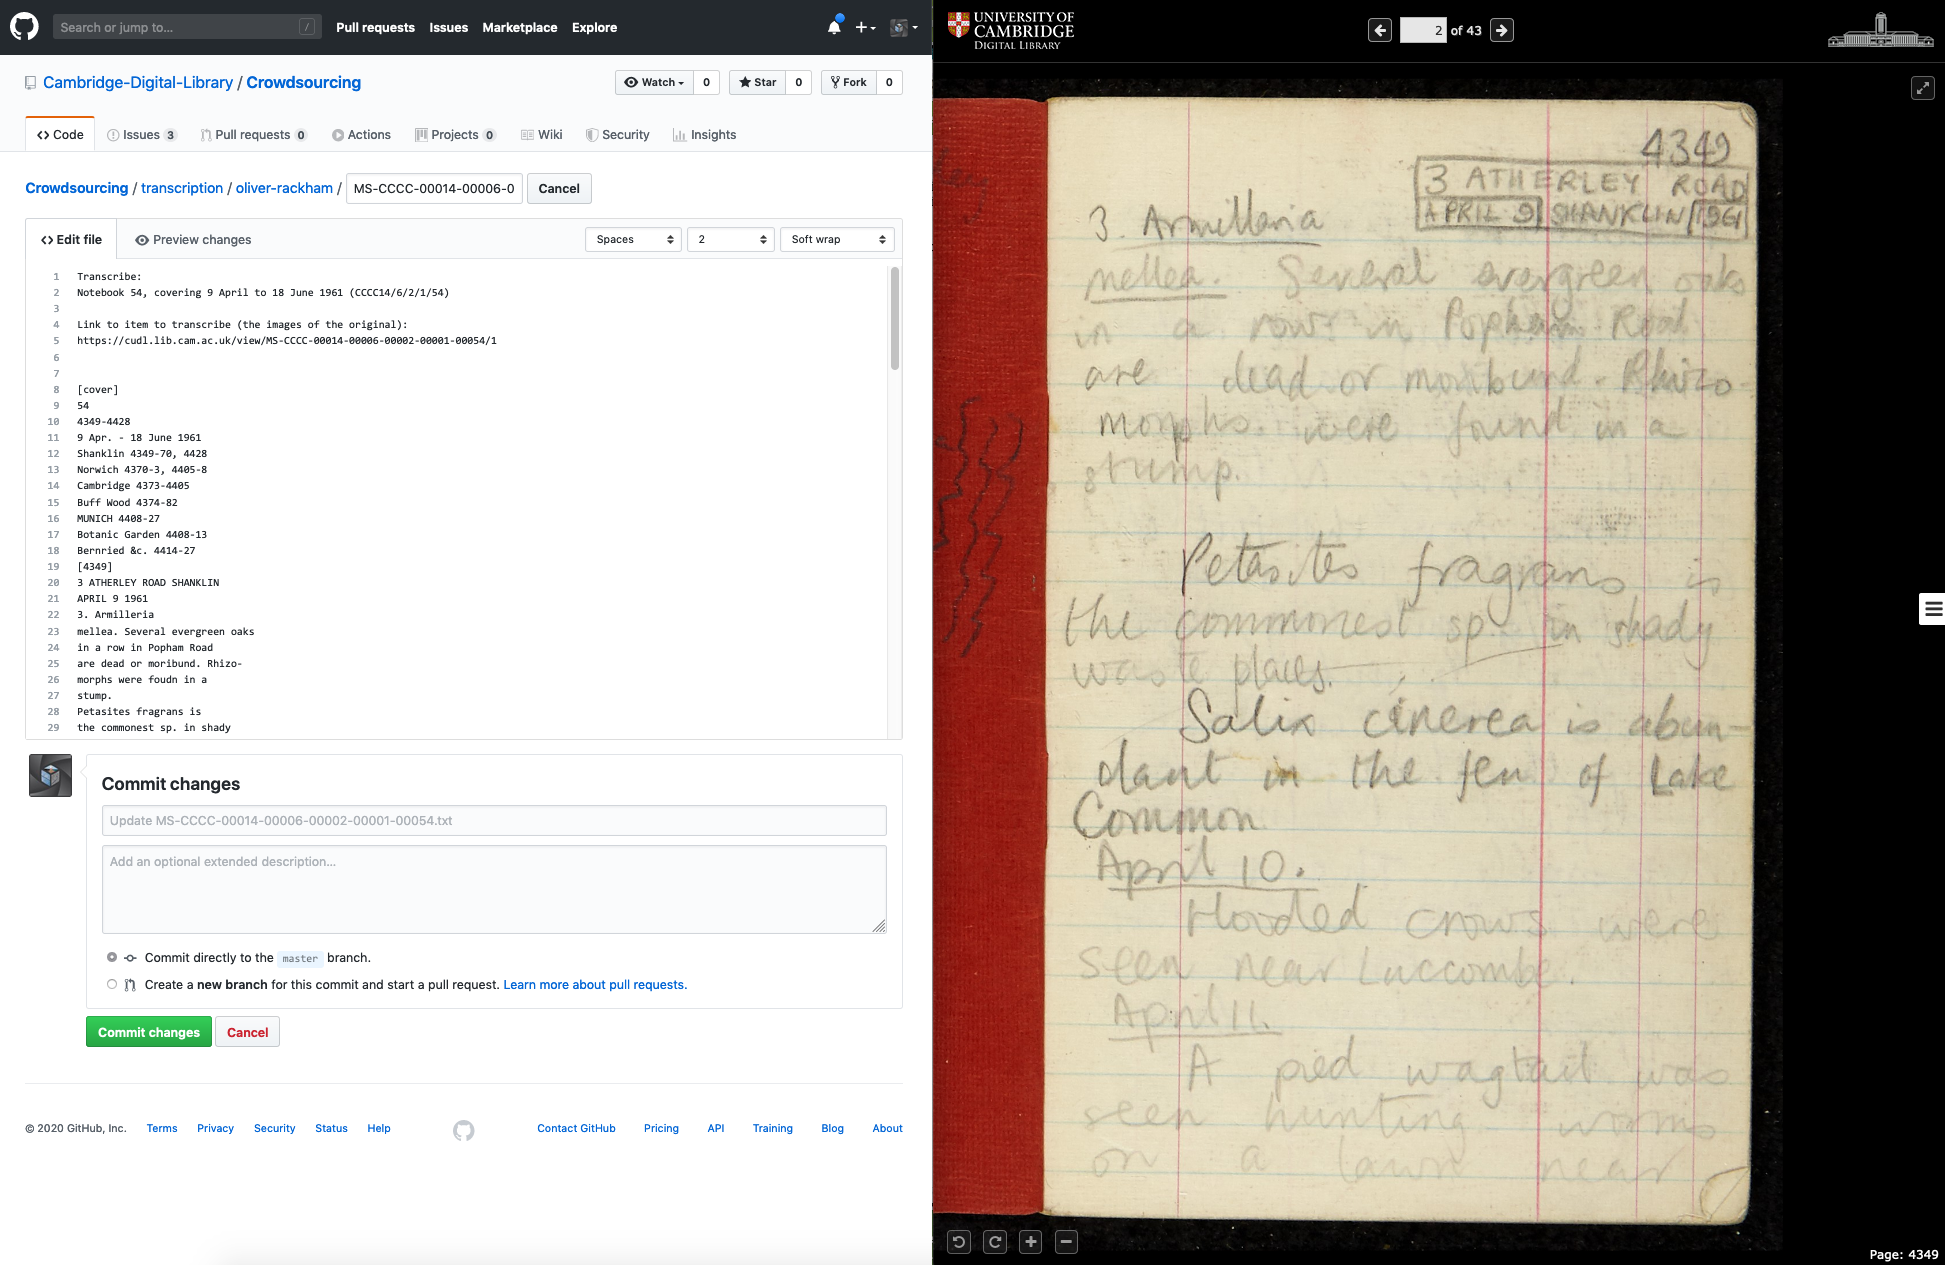
Next you'll need to open up a new browser window and go to the original item in Cambridge Digital Library so that you can see the images.
You might want to position the two browser windows next to each other so that you can see both the original image that you are transcribing from, and the text file in which you are editing the transcription.
Now, following our guide, you can begin transcribing!

Step 3: Save your work
If you want to take a break from transcribing the item, you will find a green button at bottom of the text file in Github that says "Commit changes". Go ahead and click this and your work will be saved.
Step 4: Find your work to carry on editing
When you are logged into GitHub there are some site navigation links along the very top of the web page. One of these is "Issues" - clicking on this will take you to a list of all the tasks that you have assigned yourself to and you should be able to find the links to both the images of the original item and your transcription text file in your issue.
Step 5: Finished transcribing an Item?
Once you think you have finished transcribing an item, find your task in your list of "Issues" and click on the task title. Click on the "Labels" section and go ahead and change the label to "Transcription Finished".
Next you can go ahead and assign yourself to a new item task to transcribe!
What do I do if I get stuck and need some help?
Go to the task that you need help with. You can add a "Help Wanted" label in the Labels section of the task. You can also add comments to the task where it says "Leave a comment", in this section, you can describe what you need help with, and if you include "@Cambridge-Digital-Library I need some help with this one!" then we will get a notification and be able to head over and help you as soon as we can.
If you have friends or coleagues that are also transcribing with us, you can also use this feature to ask each other questions, discuss things between yourself or tell each other if you find something exciting in the item you are transcribing and want to share!