Go to: Previous Page or Next Page
Get set-up
Step 1: Create Account
First things first, you’re going to need a GitHub account.
Go to: GitHub
Create a username, add your email address and create a password. After authenticating that you’re a human it will ask you to select a plan - choose the free option.
It will then give you the option to let GitHub get to know you a bit better with some questions. You can just scroll to the bottom of the page and click “Skip this step”.
Check your email – you should have an email from GitHub asking you to verify your email address. Go ahead and do this, which will then open a browser tab that should signal you have authenticated your email and ask you to create your first “repository”.
Unless you want to learn a bit more about GitHub and do anything fancier for your own work, you won’t really need an initial repository, but go ahead and create one:
- Give your repository a name (you can just call it “test” or “my-repository”)
- Select “Private”
- Click “Create repository” at the bottom
This will open a page up that shows a whole load of stuff you won’t need to worry about. If you wanted to learn a bit more about Git and GitHub, there should be a prompt to “Read the guide”, but we’ll cover everything you should need to know here – you don’t need to overwhelm yourself with all the coding stuff in order to help with our Cambridge Digital Library transcription project.
Step 2: Join our project
Now you have a basic account set up, you can find and join the project.
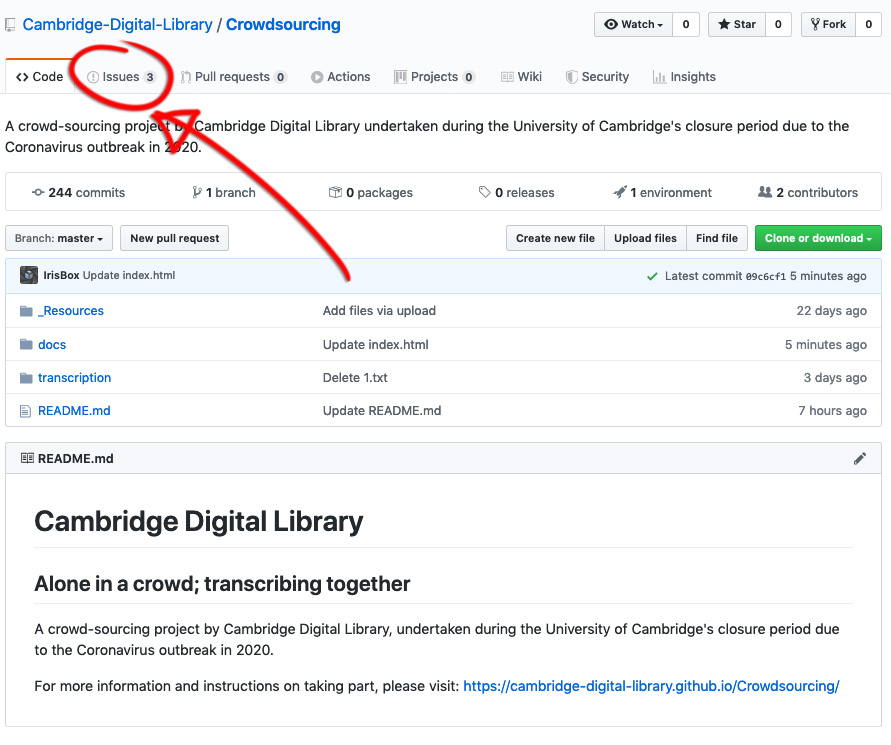
Go to the project homepage: Cambridge Digital Library - Crowdsourcing
Click on the “Issues” tab of the repository

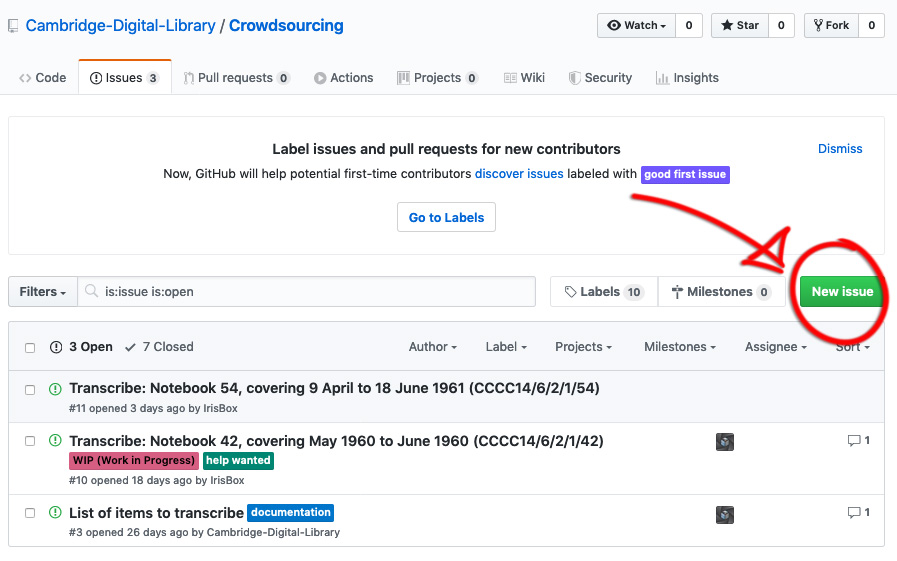
Click the green button “New Issue”

Type “Add me” in the “Title” field and then click the green button “Submit new issue”.
This will let us know that you want to join in. We can then add you to the project by sending you an invitation to join. Once we do this, you should receive an email notification.
Go ahead and click the green button “View Invitation” in the email, which should open a browser tab with a green button to accept the invitation.
Welcome aboard!
:-)
What next?
You're nearly ready to start helping us transcribe, so the next thing to do is check out our guide to transcribing.